Flute & Veining Jig
On the recently released Series 4 DVD episode 403 and 404, we used a shop made jig to put flutes and a veining pattern on tapered legs on the Italian Provincial Table. Today’s tip covers the principles of making such a jig.
Project Planning
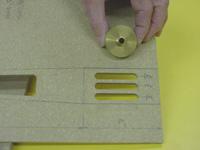
Before making any jig, determine the size of guide and bit that will be used to cut the design on the finished leg. We used a 3/8� guide with a 1/4" core box bit for the three flutes and a 1/4" guide with a 1/8� spiral bit for the veining. The flutes on the finished leg are 2 1/4" long.
Layout Of The Jig
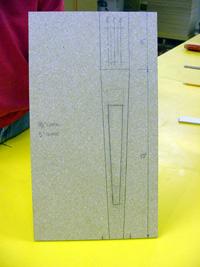
Now that the parameters are set, we can lay out our pattern. Draw the tapered leg on a piece of hardboard.
Since we will be using a 3/8” guide to cut the flutes on our project we will use a 3/8” spiral bit with a 1/2" guide to cut the slots on our jig.
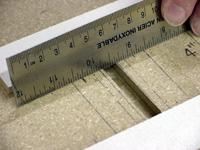
The flutes are 9/16” from center to center. Mark lines 2 ½” apart to set the length of the flutes. When you are making your jig be sure to calculate the amount of material between the flutes, if they are to close together you may have trouble with your jig.
Flute Cuts In The Jig
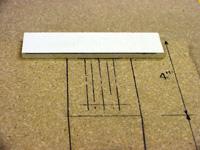
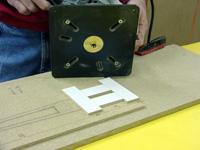
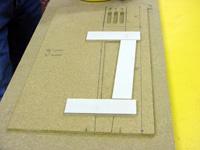
We attached strips of hardboard with double stick tape on to our traced pattern. This creates an edge for our guide when cutting the slots in our jig.
Double stick tape two pieces of hardwood 2 1/2" apart to set the length of the flute.
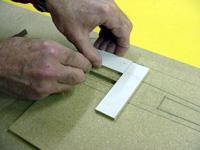
Next attach two pieces 1/2" apart on the centerline of the middle flute. Use a 1/2" measuring bar or the 1/2" guide as a spacer to make sure this is correct.
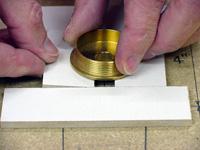
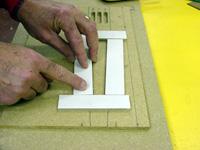
Using a portable router with the 1/2" guide and 3/8” bit cut the slot for the center flute.
Remove the side strips and measure the distance to be sure your flutes are equally spaced apart.
Attach the strips in the proper location and repeat the same procedure to cut the next two flutes.
Vein Cut In The Jig
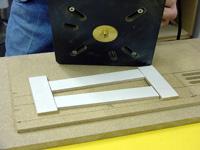
The procedure for this is the same as cutting the flutes, we will use strips of hardboard as an outline for our guide to follow. Attach these strips using double stick tape around the outline of the veining pattern.
Cut the tapered veining pattern using a 1/2" guide and 3/8” bit.
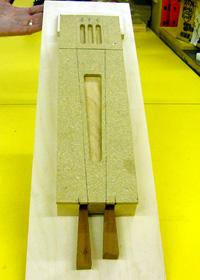
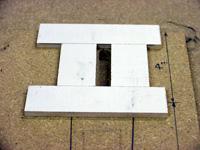
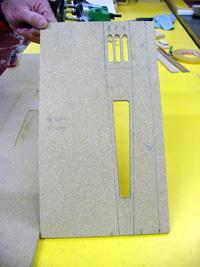
Completed Pattern
You now have completed the top section of the taper leg jig as used on the Italian Provincial Table from Series 4. Continue on to complete this fixture!
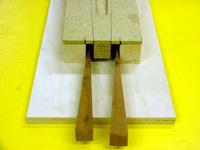
Completing The Taper Jig
Use the tapered leg as a pattern and mark the 12” taper on two pieces of scrap wood. This wood must be 2” high at the top for 4” and then tapered ½” to the bottom.
Cut the pattern to suit the overall width of your jig. Also cut the pattern 4” from the top end where the taper starts.
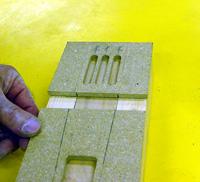
Use the leg as a spacer and nail the pattern to the two outside pieces. Screw a board on the back of the jig. Also screw a stop block at the top to hold the leg in place when routing.
Center the leg at the bottom with two wedges.
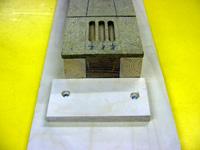
This completes the taper leg fixture, use a portable router with a 1/4" guide and a 1/8” spiral bit to cut the veining.