The Radius Joint:
Episode 903 is an eye-catching cedar house for butterflies, "The Butterfly House". Craftsmen, Bob and Rick Rosendahl show you how to use matching bits to shape the wall and roof pieces to fit together in a smooth rounded contour. You'll also discover how to make ellipse openings and shape the gables with pattern fixtures. The wood joint used on the walls and roof of the Butterfly house is the radius joint. See the photo.
Choosing the right router bits.
Choosing the right router bits. For this tip we are using the following router bits. The fingernail bit Oak Park number 32-333 and the core box bit Oak Park number 35-336 this photo shows the fingernail bit and the 1” core box bit used to make the joint for the sides and roof of the butterfly house.
Getting the right combination
To determine the correct combination of router bits see photo. Remember, before milling your material you must match the cutters as shown in this photo.
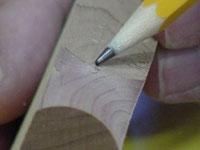
Step One: Setup the fingernail bit
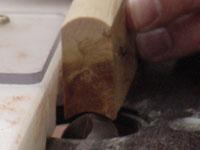
Best way to set the height of the router bit is to use the set up block that is ˝ the thickness of the material used to make the wood joint. We used ľ” thick material so a 3/8” setup block is needed to set the height of the fingernail bit. See photo.
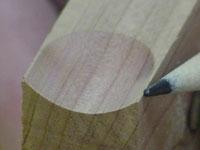
Step Two: Clamp the fence in position
To set the fence distance we need to have the in-feed and out-feed of the fence even with the centre position of the fingernail bit. To find the center position see the step one photo. If the test cut is made and you have made the right setup the cut will be the perfect curve as seen in the photo. Setup and clamp the fence to cut all of the pieces.
Troubleshooting the fingernail cut
If the fingernail bit is over exposed then the cut will be too deep as seen in the photos.
The cutter is setup past the out-feed and in-feed of the fence. If the fingernail bit is under exposed or has the fence out too far then the cut will be shallow as seen in this photo.
Tip: To readjust the fence positions, use your hammer to tap the fence to move it in the desired direction.
Step Three: Setup of the core box bit
To set up of the core box bit we have to find centre of the router bit. To find the centre of the bit and set the fence distance we use the 3/8” set up blocks as seen in the photo.
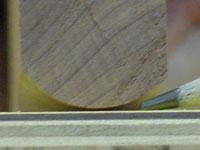
Step Four: Make the height setup
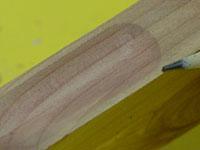
To ensure the height setup is correct, centre the cutter over the full thickness of the material. To troubleshoot the cut we first look at the perfect cut as shown in this photo.
To make the cuts you need, stand the pieces on edge and feed them over the core box bit as seen in this photo.
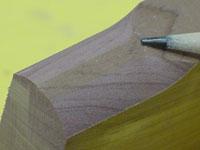
Troubleshooting the core box cut
If the core box bit is too high the cutter will cut into the sides of the sample piece as seen in this photo.
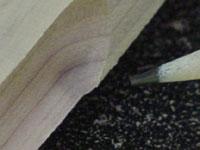
If the cutter is too low the cutter will leave a flat edge as seen in the photo.
Safety: Always keep you finger away from the moving router bits and use a safety push block when cutting the last 6 inches of the pieces.
Assemble the joint
Last step is to fasten the fingernail and core box profiles together to make the butterfly house walls and roof. See the photo.