Cutting A Cove
Conceal the hardware on you're furniture by using the common cove bit. Follow this tip to make hardware pulls on any edge of the drawer or door exactly as you need.
Step 1: The set up of the cove bit:
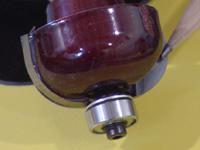
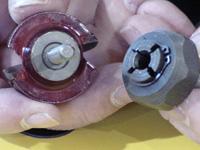
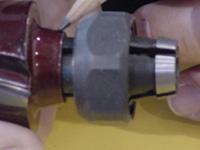
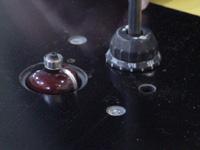
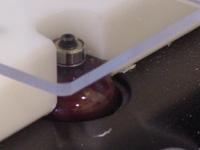
The cove bit I am using is the new Porter Cable Posi-stop cove with a ¼” shank. Posi-stop is designed to provide extra support and rigidity to the cove cutter, which allows the router bit mass to be a bit larger than normal for the shank diameter. Remember when installing the cove bit it is very important to have the Posi-stop touching the router collet. See Photos below. Install the router into the router table.
Step 2: Set the height of the cove bit to 3/8”:
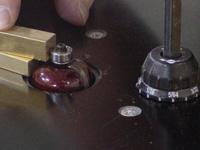
Now we need to set up the router bit height, isolate the bearing and build in the chip break on the in feed side of the fence. The first step is to set the height of the router bit, with the cove bit that means we need access to the cutting edge that is closest to the bearing. Using the 3/8” brass bars set the height close to 3/8”. It is better to lower than higher at this point.
Step 3: Check your measurements:
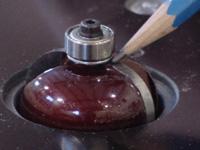
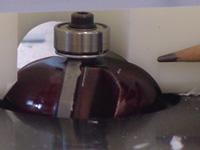
The cove bit is probably the most difficult because the cutting edge that determines the height is parallel to the table surface and not easily accessible. (See Photo) To check the measurement:1) Stack one of the other brass bars on the 3/8 bass bar and position to the bearing, 2) The cutting edge of the cove will be under the stacked bar and either high or low. If the router bit is to high then position brass bars to the cutting edge and lower the router. If the bit is low then position the brass bars directly over the cutting edge and raise the router bit to the surface. We are using the 895 Porter Cable, which makes the micro-adjustments easy from the top. Once the adjustments are made lock the router in position. see photo below
The Porter Cable 895 micro-adjustment:
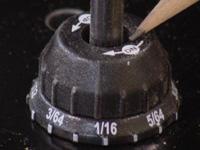
We are using the 895 Porter Cable, which makes the micro-adjustments easy from the top. To make the adjustment first unlock the base using the base hole closest to the operator. See photo. To make the adjustment put the height adjuster into the second hold and move up or down. Note the 895 height adjuster has up down direction marked, see photo below.
Step 4: Make the chip break:
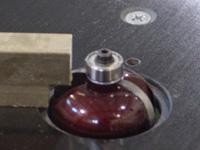
The next step is to isolate the bearing on the router bit to the in/out feed of the router fence and make the chip break on the in feed. To do this position the fence close and in the router bit channel then fasten the out feed clamp. See Photo.Then we need to start the router and move the router bit into your fence until the bearing is concealed within the router bit channel on the fence. See Photo. This operation makes the chip break on the in feed side of the fence. Remember prior to starting the router the out feed of the fence must be securely fastened in position with the clamp.
Step 5: Isolate the bearing:
The last step is to shut off and unplug the router then isolate the bearing to the out and in feed of the fence. See Photo. We now have the router bit in the correct position and ready to make the finger grooves on the doors and drawers.
Step 6: Where and at what length:
Well this is going to be the challenge because we need to be able to make the grooves at a specific length plus we need the flexibility of different positions for each door or drawer.
Example maybe on the doors that are on top we need the groove to be on the door bottom. (right or left side). On the bottom doors the grooves need to be on the door top (right or left) or maybe the grooves are made on the sides of the doors. It is important to have this planned out before we start to cut any of the grooves. Lets start by answering these questions:
1) What is the overall length of the groove? We choose “overall 4 inches”.
2) On top doors where does the groove go? We choose “bottom left or right”.
3) On the bottom doors where does the groove go? We choose “top, left or right”.
4) How far from the door edge do we position the start of each groove? We choose ľ”
5) On the drawers where does the groove go? We choose “ bottom and in the center”.
Now we know exactly where to put the groove in all of our doors and drawers.
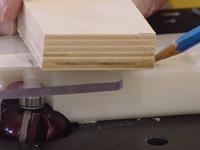
Step 7: Stop and start positions on the fence:
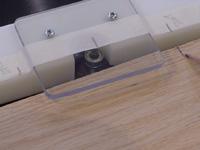
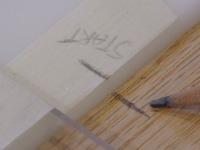
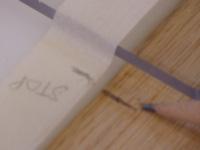
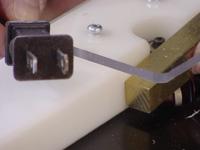
Lets start with the router table fence by putting a strip of masking tape across the in feed and out feed of the fence. Using a sharp pencil mark the center position of the cove bit using the pilot bearing screw as your guide. See Photo Next we want to mark a line on either side of the centerline at 2 inches. Tip: use a 2-inch wide board as you guide. Write “start” by the line on the in feed side of the fence and on the out feed of the fence write “stop” close to the line. Now we have the start and stop positions set on the router fence.
Step 8: Marking the doors and drawers:
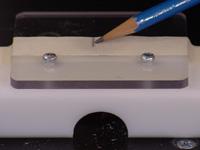
On this step the only mark we need is the center position of the groove. On the doors this is ľ” from the edge plus 2 inches or ˝ the length of the groove. Tip: Use a marking gauge with a hooked edge. For US this would be 2 ľ” with the hook. See Photo. On the drawer fronts we just need to mark face side up in the center and on the bottom. Mark your pieces.
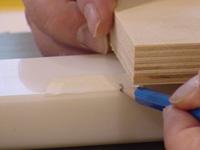
Step 9: Making the cuts:
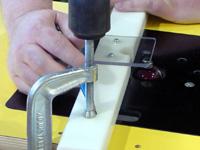
To make the finger groove in the drawer or doors we have to make a start/stop cut. We support every piece that needs to be cut on edge of the in feed of the fence, line up the centerline on the piece with the start line on the fence and move the piece into the cove cutter. See Photo Practice this cut WITHOUT the power on until you’re sure you have the procedure right. The process is: 1) center line of the door or drawer touches the start line on the fence (see photo), 2) cut the cove until the center line lines up to the stop line on the fence (see photo), and 3) move the piece away from the moving cove bit. When you’re comfortable with the cutting procedure turn on the router and make the cuts on sample pieces first, then cut your doors and drawers. Good Luck and always keep it safe in the workshop.