Router Jointer Fence
The principle of the Jointer Fence
The principle of a jointer is simple. The cutter is in line with the out feed table and the in feed table is lower by the amount which has to be removed. The in feed table is used to start the piece on the cutter and the out feed table is used to receive the piece after it is cut.
On a router jointer fence the principle is the same. The in feed is less by the amount you wish to joint from your material. The jointer fence we use on the program from Oak Park has a difference of 1/16”.
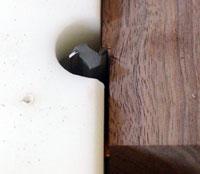
The out feed is the most important part of the jointer because the outer cutting edge of the bit must be even with the out feed side of the fence for the jointer to work properly.
If the bit extends beyond the out feed side of the fence, there will be a gap in the outfeed side between the project piece and the fence, which will cause a notch in the end once it moves past the in feed side.
Clamping The Fence
BE SURE THE ROUTER IS UNPLUGGED TO SET UP THE ROUTER JOINTER FENCE!
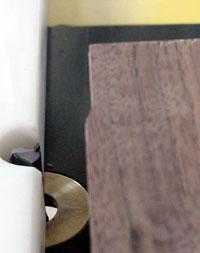
Clamp the out feed side of the fence to the table flush with the bit.
Advance the in feed side of the fence until the bit is behind the edge of the fence.
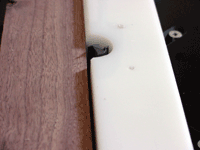
Check the position by placing a straight piece of material even with the out feed side of the fence. If it is set up correctly there will be a gap between the material and the fence on the infeed side (closest to the operator).
Check The Position
Place a straight piece of material even with the out feed side of the fence. By hand, rotate the cutter until the outer most cutting edge is in line with the material. Adjust the fence until the bit edge touches the material, and then clamp the in feed side of the fence to the router table.
Prior to cutting, be sure the router is still unplugged and rotate the bit by hand so the cutter just touches the material. Make any minor adjustments with your fine adjusting tool (hammer).