A Simple Napkin Holder!
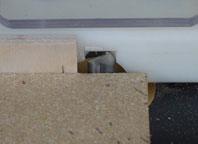
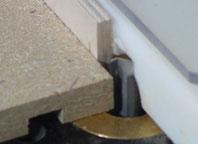
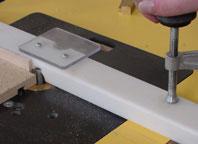
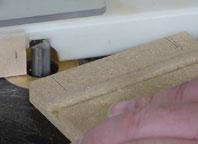
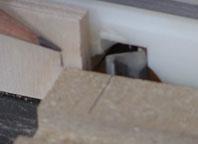
To complete this tip we need to build a simple project out of MDF or use WOODSTALK straw board. As a sample project we are using a simple napkin holder. If you’re interested in making one of these simple projects here is the parts list: A) 2 pieces 4” X 4” X 1/2” and B) 1 piece 2 ¾” X 4” X ½”. Cut a ½” dado into the side pieces A, Photo 1 set the depth of cut for the dado, Photo 2 sets the distance away from the fence 3/4" , Photo 3 cut the pieces, and Photo 4 are the results of the cut. Then follow the router tip directions to make and set up on the jointer fence:
Adding the look of feet
Adding the look of feet to that simple project adds the finishing touches. Try this tip to learn and practice the process of the stop and start on the jointer fence. We think it will add something extra to your finished project. Below is the tip showing how to use the jointer fence to put feet on your projects.
Converting your table fence:
To convert your table fence into a jointer fence we first need a small piece of 1" X 8" X Ľ” plywood and double stick tape. On the out feed of your table fence we fasten the Ľ” spacer using the double stick tape. Be sure that the double stick tape is dust-free when positioning and sticking the Ľ” plywood to the out feed of the table fence.
Setting up the fence:
We now need to install the ˝” straight bit into the router and mount the table fence in place. The out feed side is the first position to be clamped. Now we need to position the fence to the 1/2" router bit. Position a straight piece flat to the out feed side of the fence and move the fence until the straight piece touches the cutting flutes of the router bit. Once you have the fence in position, clamp the in feed side of the fence. The table mounted router is set up.
Mark the pieces:
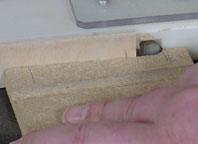
After we have cut the dados in the sides and before we start the cutting the feet we need to mark the width of the feet on both sides. We used a piece of ˝” material to measure the sides and mark the feet positions on each of the two 4” sides. See photo.
Cutting the feet:
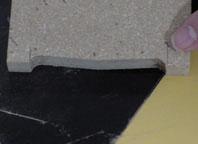
It is important to understand the of order of part positions on the fence before cutting the pieces. Step 1: First position the lower corner of the dadoed edge of the side directly on the in feed side of the fence. Step 2: then position the full edge onto the out feed side of the fence at the desired mark. We would suggest that you practice this procedure without the power turned on first to make sure that you have the procedure down. It is important to have the side firmly supported on the in feed before we position the material on the out feed. Remember: As you touch the material to the out feed the moving cutting edge of the router bit touches the material. At this point we need full control of the piece.
Order of cuts:
Once you feel comfortable in the procedure of placing the material then lets turn on the router and make the first cut. Flip the piece and make the second cut. See photos below.

Quick project rounding over tip:
Glue the project together then round over all the desired edges. In this case it is easier to round over the edges after the project has been assembled. Be sure to pick a round over bit that works best for the thickness of material. We used a 1/8" radius round over bit for our project.
Practice with your router:
Best way to practice your routing skills is to make small projects like this napkin holder, 20 or 30 at a time. This project will cost 20-30 cents each to make plus paint to finish. The skill to practice here is using the jointer fence to cut the feet on small pieces. Happy routing and remember to be safe in your workshop.