Gluing Fixture For Columns:
It can be very difficult to hold irregular shapes in place while the glue sets. This is an easy method, which can be used for many different projects.
Measuring The Column
You need to choose the size of column suitable for your project by making a layout on paper. As shown in the example below, for hexagon columns only, the outside width of the column flats or the face length equals the radius.
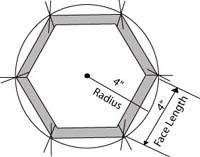
Our 30” diameter cocktail table had a 7” wide column with flats measuring 3 1/2”. To make a layout on paper draw a straight line. On the center point of this line draw a circle with a compass using a radius of 3 1/2”. Where the straight line meets the circle use the compass with the same radius to mark the next intersection. Continue walking around the circle until complete. Join these six equal marks. This is the size of your finished column.
Fixture Material
Cut 4 pieces of 1/4” thick material into squares that are 4” larger than the overall diameter of the column circle. Mark the center on each piece. It is always better to make the circle slightly larger to fit easily over the column and let the wedges do the clamping. Therefore make the radius 3 3/4” (measured from the center point to the outside edge of the router bit).
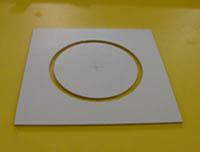
Cutting The Circle
Secure the 1/4” material in place on some scrap plywood in two corners with finishing nails. Mark the center point with a nail. You will need to drill a small hole on the circle jig 3 3/4” from the outside of the bit. Secure the circle jig through the pin hole on the center mark of your 1/4” material and cut the circle. Repeat for all 4 pieces (or the number you require). The image here shows the finished cut, for complete details on how to use the Oak Park Circle Jig click here!
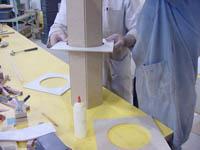
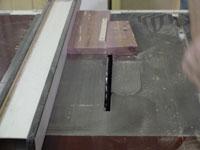
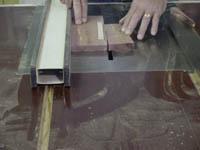
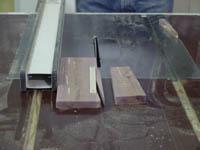
The Wedges
Next we need to make some gluing wedges as shown in the photo…use a tablesaw to make these wedges. The dimensions of our wedges were 3/4” to nothing in 7”.

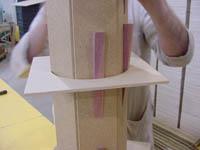
Dry Fit The Columns
Dry fit the columns then glue the columns together, we have used plywood splines to hold our column pieces in place. This technique for putting columns together will be used on the cocktail tables during our upcoming 11th season featuring WOODSTALK, a fiber engineered product by Dow.
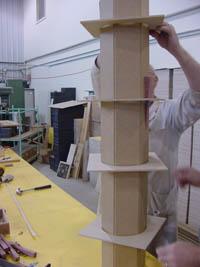
Placing The Gluing Fixtures
Place the gluing fixtures equally spaced on the column then insert the wedges into position. Check the fit on the columns to be sure the joins are all tight.