Using A Pattern To Trim Wood
We get many inquires regarding the best method to duplicate a particular shape using the router. The answer is not simple. Some of the factors to consider are listed as follows:
- Will the pattern be top mounted or bottom mounted;
- Can the pattern and material be held safely;
- Will tear out be a problem;
- With irregular shapes, will the material break off at any weak areas due to grain direction.
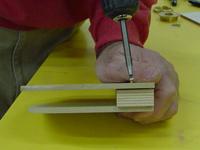
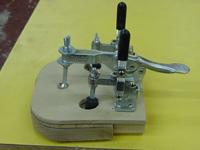
The Router Bit
The one bit we will be using is a 1/2” diameter top mounted ball-bearing flush trim bit. We will be using it with and without a guide.
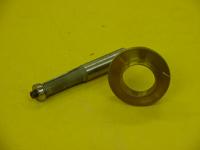
The diameter of the bit always determines the amount of material overhanging the pattern. Remember one-half of the bit is actually cutting the material and the other half is pulling or tearing. In other words, the material being trimmed should be no more than 1/4”.
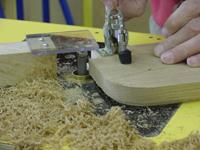
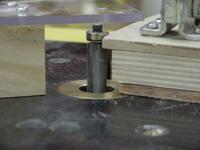
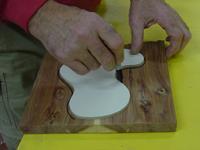
Bottom Mounted Pattern
In our first example we will use a bottom-mounted pattern that follows a 1” guide.

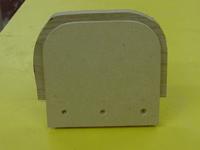
Mark the wood no more than 1/2” from the pattern and band saw. It is 1/2” from the edge of the guide to the center of the bit. Clamp securely in position. Mark the area to be scored to help protect against tear out and cut.
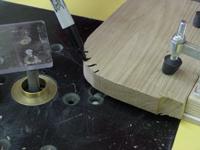

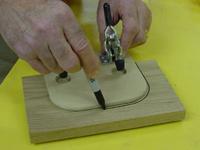
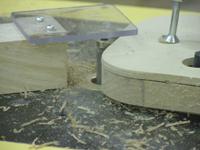
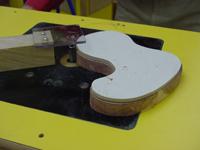
Top Mounted Pattern
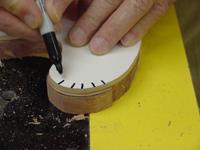
In our second example, the guide is removed and the bearing follows a top mounted pattern. Our wood fits between the pattern and a support piece of material on the bottom. Drill two holes in the pattern for the clamps that hold the wood to the bottom material. Attach another clamp with a longer throw to hold the pattern tight to the wood.
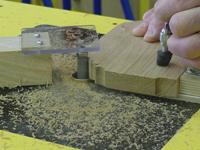
Mark the wood no more than 1/4” from the pattern and band saw. Clamp into position, check that the bearing follows the pattern, score in the desired area and cut.

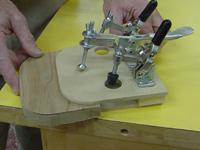
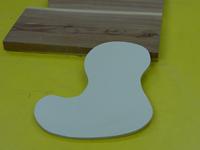
Irregular Shape
In our last example we will use an irregular shape top mounted pattern. Because of the grain direction you must be cautious of the tear out areas and also any narrow or weak spot where the wood will simply break off.
Attach the pattern with double stick tape, mark the wood to within 1/4” and bandsaw.

Mark the areas to be scored and proceed to cut.
As you can see on our sample, the weakest part broke off because of the grain.
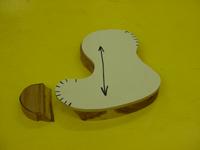
The easiest solution to this problem - use none directional material. It cuts smooth in any direction but creates a lot of dust!