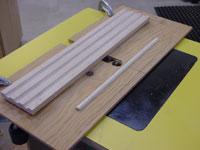
The simple fixture: To make multiple spaced flutes
Jim from Deerfield, Illinois has emailed us his problem about keeping the spacing equal when cutting the flutes in a board. Jim’s email also informs us that he is using a ˝” round nose bit to cut the flutes. Thanks Jim.
The objective is to make a fixture that will produce equally spaced flutes on a specific width of board. We are missing some information on how the flutes finish on the ends of the boards. There are two ways to finish the ends, the first is to run right through and the second is to start the flute with a margin of space before the “start end of the board” and stop at the same margin “before the exit end of the board”. The method below describes how to build the fixture that will run the flutes right through the board. This simple fixture will need to keep the distance the same for each cut. (See below.)
Tools and Materials: This requires the use of a table-mounted router, a router, 1” brass guide/ring nut, 1” straight bit, a ˝” round nose bit and a ˝” bull nose bit. Material needed is 1 piece Ľ” X 10” X 20” plywood, 1 piece of ˝” X 4” X 12” hardwood.
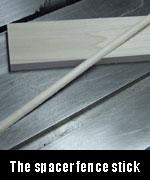
Making the spacer fence stick
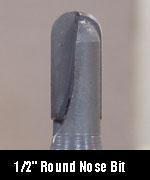
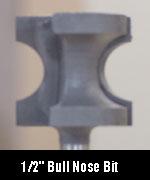
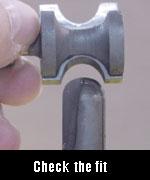
We need to make the spacer fence stick that is going to leave the equal spacing. The spacer stick needs to be made so it fits into the flute. If we are going to use the ˝” round nose bit to make the flute then the router bit that will make the opposite shape is going to be the ˝” bull nose bit. Remember that the spacer fence stick we make must be lower than the depth of the flute cut made by the round nose bit.
The router bits must match: The first picture shows the ˝” round nose bit, the second picture shows the ˝” bull nose router bit and the third picture shows the matching process. (See below.)
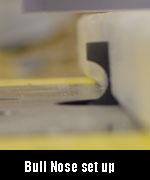
Molding the edge of the spacer stick: To make this piece we are going to mold one edge of the material with the bull nose cut. Size a piece of material to ˝” thick X 4” wide X the length. The length of the piece does not need to be more than 12” because it is going to be used as a fence which needs 6” of fence (in-feed) to get on the router bit and 6” of fence (out-feed) to get off the router bit.(See below for the set up.)

Cutting the Spacer Fence: The next step is to use the table saw to cut the shaped edge off the material at the right height to fit the flute. (See photo for the cut.) The two reasons we use a 4” wide board are first to give support and second to save fingers. Milling thin a board is not safe.
Making the chute board
The chute Board: Next we are going to make the chute board for the spacer stick. This is made of Ľ” X 10” wide X 20” long. We want to put a 1” X 8” channel cut at 10" on center across the width. (See the steps below.)

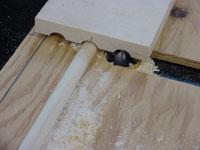
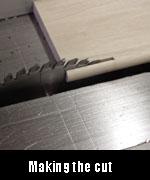
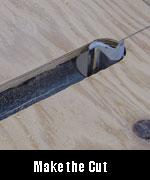
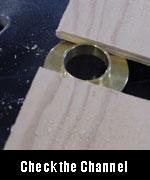
Make the cut: This channel cut is used with the 1” guide to position the router bit perfect every time. Tip: remember the guide should run freely in the channel. If the fit is to tight after the first cut use your hammer to slightly tap the fence away from the router bit and make a second cut in the channel. Be sure to check the fit before and after each cut. (See photos.)
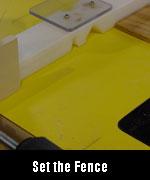
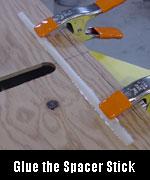
The assembly step: The last step to making the flute chute board is the assembly. On the side that has no channel cut we are going to draw a line full length at 1-˝” away from the edge. On this line we glue the spacer fence to the chute board making sure that the fence is firmly attached. After the glue dries we remove the excess glue and clean up the fence. (See photo.)
Test your skills
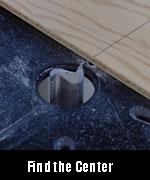
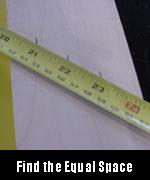
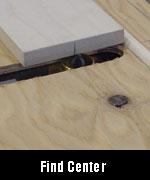
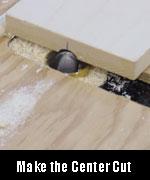
Set up tips: Identify, divide and mark the amount of flutes required into the width of the board. We have set up the fixture to cut an odd number of flutes with a equal number of spaces. Find the center of the board and clamp the chute board into position. Make the cut for the center flute.
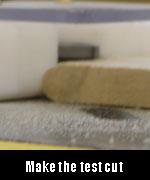
Make the first cut on a shorter piece of test material of the same width. CAUTION: The round nose bit will want to push the board upward while cutting. Make sure to keep your hands away from the router bit and always use a pushstick. Cut all of the needed pieces at this fence position.
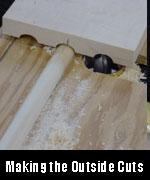
The next cut using the test piece: Place the center cut on the spacer stick and reposition the fence to match the outside marks, clamp the fixture then make the next cut. End for end the board and cut the other side of the board. NOTE: make sure that the center cut is on the spacer stick for both cuts. Check the test cut, if the fence is in the right position drill and bolt the fence to the router table through the pre-drilled holes in the router table. If not the right spacing re-position, re-clamp and re-cut a sample piece. For five flutes we just repeat the process but use the outside flutes from the center flute to position the next two cuts.
bove we have shown you how to make the set up for odd flute cuts with equal spacing. Here is the skill testing task: Outline the procedure to make 4 flutes with 5 spaces. The two challenges are 1) to build this fixture 2) figure the set up procedure for equal number of flutes and the odd number of spaces.